en
en  Russian
What is Proxifier?
Proxifier is a proxy tunneling application. It lets you tunnel a connection, of any applications to your desired HTTP or SOCKS proxy connection. With Proxifier, you can easily use a certain proxy you desire even if the application you are going to use doesn’t support change or specification of certain proxies. Proxifier can give you more privacy as per it can hide your real IP address, hence making your internet browsing more secure.
Proxifier comes in both standalone full version and also with a portable version. It is compatible with almost any operating systems. With proxifier, you can also get the power to resolve your DNS settings to what you wanted it to be. It also supports IPV6 ip system, and also all connection types such as HTTP, SOCKS v4 and also v5.
You can get it at http://proxifier.com , for free trial or you can purchase it. However, the portable version can give almost anything and everything you need with a proxifying app. This also is a no-install version so it is very easy to use.
How to get SOCKS proxies
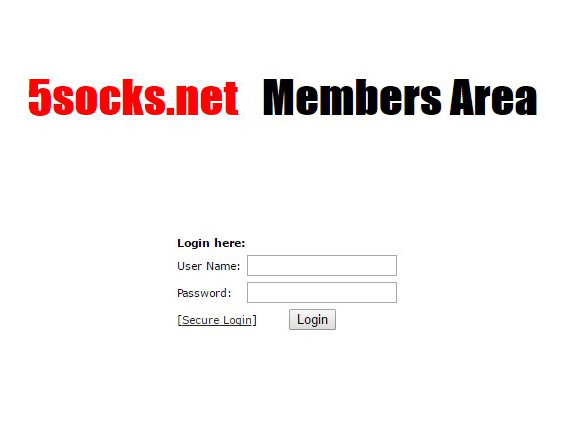
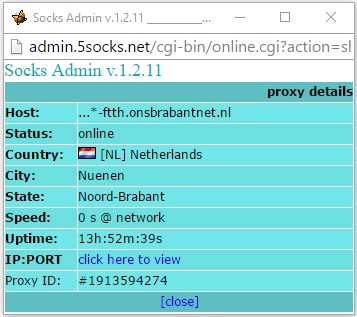
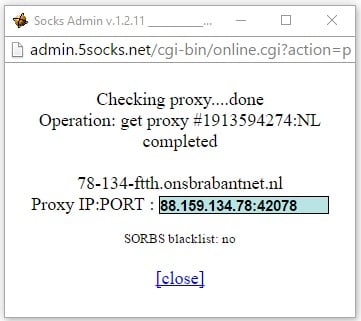
- You can get SOCKS proxies at https://admin.5socks.net
-
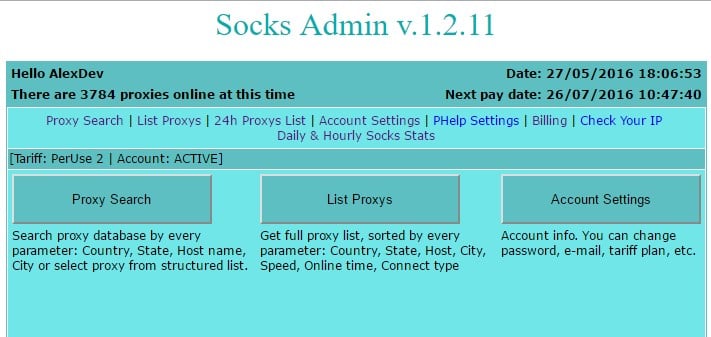
Log on in your socks admin with your respective account info.
-
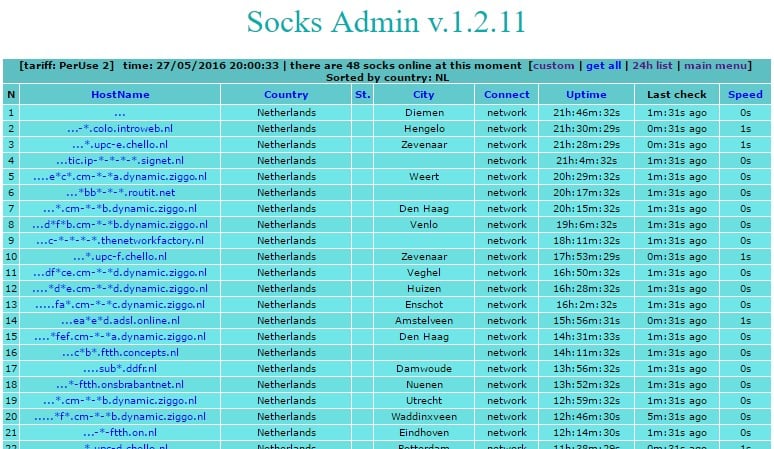
You can choose either if you wanted to search for a specific proxy, or you just want to see a generated list of the currently available SOCKS proxies.
- Select a proxy from a result you had desired, and then view a certain proxy detail by clicking its hostname. Click on view and then wait until the proxy server address and port is revealed.
- After that, take note of it and you are now ready to use it on Proxifier.
Using Proxifier
- Open and run Proxifier. When Proxifier is running, and no internet connection is happening, you can only see an empty and blank window.
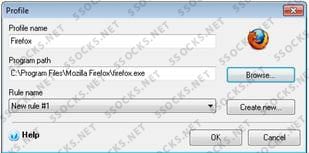
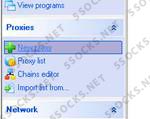
- To add a new proxy rule, just click on Profile > Proxy Servers.
- Clicking on Proxy Server will bring you to a window showing the proxy you had input with Proxifier, and for the first time of usage, it will be empty, just click on the Add button and another window will open.
- Input the necessary data regarding your proxy information.
On the Proxy server field, input the Proxy server address you had obtained from 5socks.net
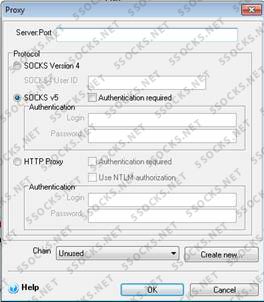
On the Protocol field, select the connection protocol you want to use depending on your proxy type.

Then click on okay and follow the prompt on making the input proxy as default profile.
- You can also save the proxy profile manually so you can use it again in case you are going to use another proxy. Click on File > Save Profile and then put any name you want and proceed on saving your proxy settings profile.
- Then launch any application you like. By default, Proxifier starts tunneling connection to almost every program that connects on the internet. Let’s say, using Mozilla Firefox, go to http://ipleak.com/ to check if your current IP now reflects what you had input in the Proxifier settings.