 en
en  Russian
Introduction
Nowadays, almost all people who have an iOS or Android device want to have an anonymous and safe access to websites and web services. There are a lot of software solutions for Android devices, that allow users to organize such access via 3G connection, but unfortunately there are no such apps or settings for iOS devices. For example, proxy server settings on iPhone and iPad are available only for Wi-Fi connection, so user can’t use proxy via 3G when Wi-Fi network is unavailable.
So, how can you get an anonymous and safe access to web via 3G in iOS? You can use RDP and SOCKS proxy to get an access to websites and services from iOS devices through remote Windows server. It’s easy to organize – every user, who knows what is OS Windows can do it himself.
What is RDP (Remote Desktop Protocol)? | FEATURES AND ADVANTAGES
Remote Desktop Protocol (RDP) was originally created by Microsoft to allow users to get a remote access to Windows servers and computers from home computers and mobile devices. Practically, this function can be useful for mobile device user, who wants to get an anonymous and safe access to web sites and to bypass the operator’s regional restrictions. RDP allows to conceal the fact of tunneling, so your Internet provider can’t see, that you are using blocked web service or site, and will not be able to track your web activity.
Free RDP | How to get free RDP
First of all, you need to rent a remote Windows server, where you can configure RDP+SOCKS Proxy for anonymous and safe connection to web resources. User can connect to this server from his mobile device using RDP and open web sites directly from remote server desktop. Here are some links to web sites, where you can rent Windows server:
-
VPS.ua
-
Rusonyx
-
Inferno Solutions
-
1Gb.ru
-
Siteko.net
If this sites are unavailable, or you want to get more powerful server for high performance tasks, you can find cheap service in web, that will provide you with permanent access with required performance.
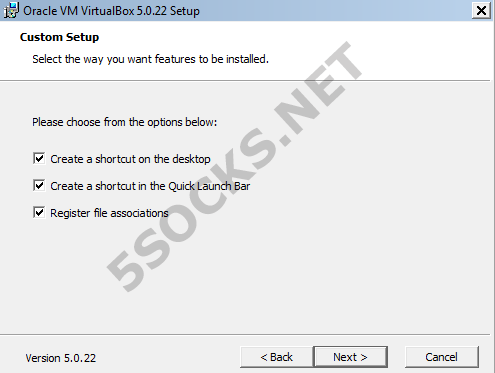
After singing in and paying for rent (for non-free services), the provider will grant you a remote access to server. You need to rent a Windows server, because it’s configuration doesn’t differ from your home Windows PC configuration, so you don’t need special computer skills for RDP configuration.
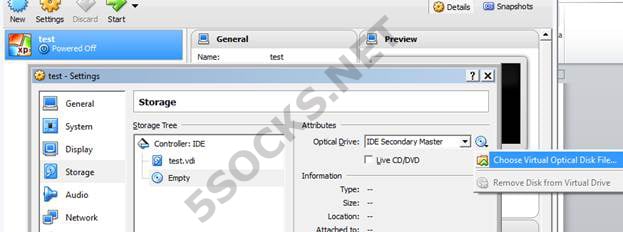
Android/iOS configuration and connection to remote desktop
After signing in, service provider grants you an access to personal account, where you can find an IP-address of Windows server. You need to enter this IP-address in RDP client to connect to remote server.
Do the following steps:
- Install RDP client to your mobile device. The most convenient and stable RDP client is Microsoft Remote Desktop. This app produced by Microsoft and is available on App Store (iOS) and GooglePlay (Android). It uses RemoteFX technology with Windows gestures support for mobile devices, which greatly simplifies the management of remote desktop from mobile device touchscreen. Application has the following features:
-
access to remote resources via Remote Desktop Gateway
-
multitouch with gesture and RemoteFx support
-
safe connection to applications and data
-
easy management of all remote connections from the Connection Center
-
high quality audio and video streaming
-
supports Azure RemoteApp.
- Launch Microsoft Remote Desktop on your mobile device. To create a new connection tap + and choose Add PC or Server.
- Enter IP-address of the remote server in PC Name and tap Add user account. Enter the name of the user and the password, you’re using to connect to remote server desktop. In addition, it is possible to configure additional settings in the Settings menu, such as screen resolution, local storage, scale (available in Windows 8 and later). These additional settings are optional.
- Tap Save. Then tap on the connection icon to connect to remote server desktop.
- Microsoft Remote Desktop supports 2 types of pointer management: virtual pointer (mouse mode) and touch mode. In the first case, you move pointer to icons, and start the applications by double-clicking or use other clicking algorithms to launch other functions. Available mouse modes are defined in the table below
| Mouse mode | Mouse operation |
| ||||
| Direct touch | Left click | 1 finger tap | ||||
| Direct touch | Right click | 1 finger tap and hold | ||||
| Mouse pointer | Left click | 1 finger tap | ||||
| Mouse pointer | Left click and drag |
| ||||
| Mouse pointer | Right click | 2 finger tap | ||||
| Mouse pointer | Right click and drag | 2 finger double tap and hold, then drag | ||||
| Mouse pointer | Mouse wheel |
| ||||
| Mouse pointer | Zoom | Pinch 2 fingers to zoom in or spread 2 fingers to zoom out |
In the second case, you can use iOS touch mode for remote desktop: double tap on icon to launch application or tap and hold to launch context menu.
Tap the left menu button and Touch or Mouse button to switch between Touch Mode and Mouse mode.
- Tap on the keyboard icon at the top menu to launch virtual keyboard.
How to get a Socks proxy list
First, you have to get an access to SOCKS proxy at https://5socks.net. Follow this simple steps.
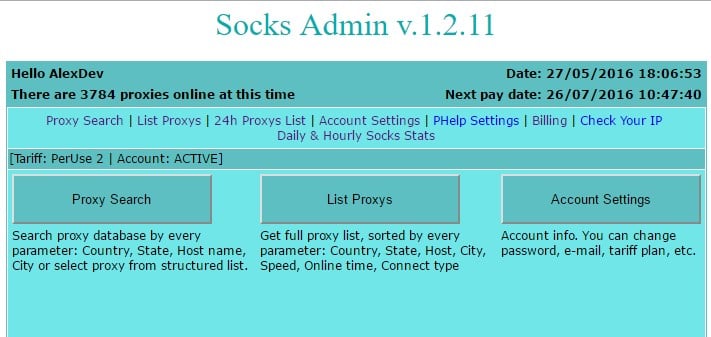
- Launch browser on the mobile device or remote desktop and open https://admin.5socks.net/. Enter your login and password to get an access to Administration Panel
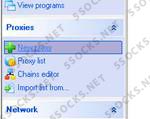
- Next, SOCKS management page will open, where you can find socks 4/5 proxy by different parameters (Proxy Search), choose any available proxy from list (List Proxies) or manage your account details (Account Settings).
- Click Proxy Search and choose the country which proxy servers you want to use. Click Go to continue.
- The results will be displayed in a new window, which contains information about each proxy server: country, state, city, network, running time, and speed.
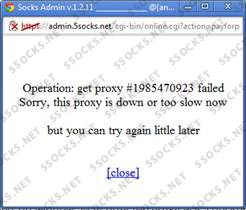
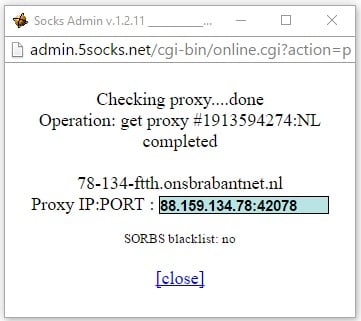
- Click on the host name and you’ll see a pop-up window with details about the particular proxy server. To view the proxy server’s IP address and port, press click here to view

- Wait a few seconds while the software queries the proxy server, then you’ll be displayed a pop-up window with the results (see below). Copy or write down the IP address and port – you’ll need it later. In this example, the IP-address is 83.85.214.142, port:58933.
Firefox Socks5 proxy configuration on the remote server
-
Connect to remote desktop according to the recommendations in this manual.
-
Launch browser on the remote server, download and install Firefox.
-
Launch Firefox on the remote server, open settings panel and select «Options».
- Open «Advanced» tab, then «Network» tab and press «Settings» button
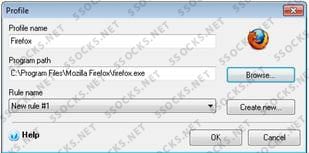
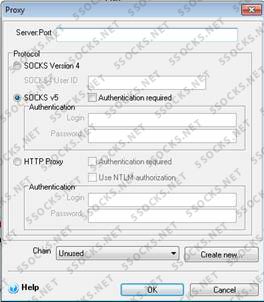
- Configure parameters in connection settings dialog:
-
Manual proxy configuration
-
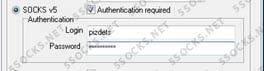
SOCKS v5. Type the IP-address of the SOCKS server from https://5socks.net (in this example 83.85.214.142)
-
Type the number of the SOCKS port from https://5socks.net (in this example 58933)
-
Activate SOCKS5 and «Remote DNS» (DNS lookups will be done on the SOCKS server)
-
Press «ОК» button.

-
Firefox is configured.
-
Check your IP-address at http://www.ipleak.com/.

As we see, Firefox works through proxy, and the IP-address of your computer is 83.85.214.142 (Netherlands).
Internet Explorer Socks5 proxy configuration on the remote server
- Launch Internet Explorer, select «Tools» -> «Internet Options».
- Open «Connections» tab and press «LAN Settings…» Activate «Use a proxy server for your LAN» and press «Advanced» button.
- Type the IP-address and port of the SOCKS proxy from https://5socks.net (in this example IP 83.85.214.142, port 58933)
NOTE! Type the IP-address only in the SOCKS field. Keep other text fields clear.
-
Click «ОК» button in all setting pages
-
Done!
-
Check your IP-address at http://www.ipleak.com/.
As we see, Internet Explorer connects to web through SOCKS proxy, and the IP-address of your computer is 83.85.214.142 (Netherlands).