 en
en  Russian
Almost all users, who are interested in building safe connection between computers in the Internet, have heard about RDP and VPN. Most forums about safe internet browsing advise visitors to use RDP and VPN for communication with remote websites and servers to maintain anonymous internet browsing. At first glance, such advices seem to be too complicated for average web users and can be understood only by computer network professionals. However, even a beginner user is able to configure VPN and RDP connection for establishing an anonymous access to web resources.
First, we need to understand the situations when an ordinary user, who is not familiar with network administration issues, need to establish a secure connection to remote devices. Historically, VPN was used by large corporations for their remote employees, so they could get a remote access to corporate servers and work with company’s documents from remote computers. Later, this feature became useful for ordinary PC users, searching for methods of establishing an anonymous and secure access to web resources.
How it works. In fact, there are 3 common steps for establishing an anonymous connection to web resources. First, you need to use SOCKS proxy for IP spoofing to change your real IP and hide the fact, that you are using proxy. Connection to this SOCKS proxy must be configured on the dedicated remote server, used as another proxy to hide your activity from your internet provider. Second, you need to create a secured connection to this dedicated server using VPN and RDP. This can be illustrated with a following schematic drawing:
As you see, there are 2 intermediate nodes (remote server and SOCKS proxy) between user’s device and website, which are used to hide IP address and to protect traffic from 3-rd parties. This way you can dramatically decrease the number of targeted attacks, prevent data interception and hide your real IP address.
So, what does the abbreviations RDP and VPN mean? Remote Desktop Protocol (RDP) was developed by Microsoft Corporation to provide users with the ability of a remote connection to servers and computers running Windows operating system. In fact, with this protocol users can work on a remote computer as they are working directly on it. After connection via special RDP-client software user see the desktop of a remote computer and can work with it using keyboard and mouse. All you need is to allow RDP-connections on the remote computer and connect to it using RDP-client. You needn’t install additional software and can use standard software tools of Windows operation system.
Many users believe that RDP can damage the security of your operation system, but it is far from real. RDP not only highly secured protocol, but also allows to hide the fact of tunneling. Thus, SOCKS-proxy “thinks” that you connect directly from the remote server and the website you are connecting to “thinks” that you work directly from SOCKS server. So, in fact, using this chain you are spoofing your IP address twice and securely hide it from intruders.
This method of establishing remote connection is simple and doesn’t require any special knowledge. As a rule, when you lease a remote Windows server, the provider gives you the password for a RDP connection, so you needn’t take any additional actions to use RDP. You just open the RDP client in your Windows operating system, enter the IP address of a server and login with password, given by server’s provider. That’s all! Now, you operate with the remote server’s desktop with your keyboard and mouth (or touchscreen if you use mobile device). Thus, you need to perform only 3 simple steps to build secure and anonymous data channel:
- Rent a Windows server
- You’ll get login, password and IP address of a rented server
- Launch RDP client on your PC or mobile device, enter login, password and IP address of a rented server from the previous step
After completing these 3 steps, you’ll see the desktop of your remote server and can manage it using the keyboard and mouse or touchscreen of your device.
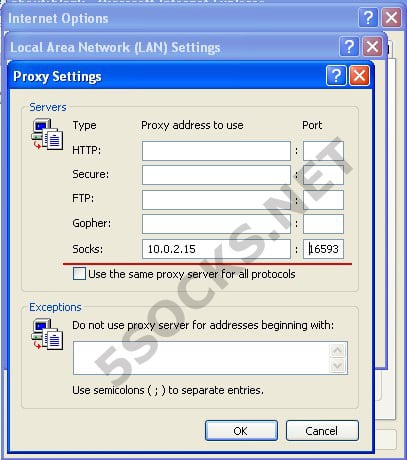
Next, you need to configure SOCKS proxy on the remote server.
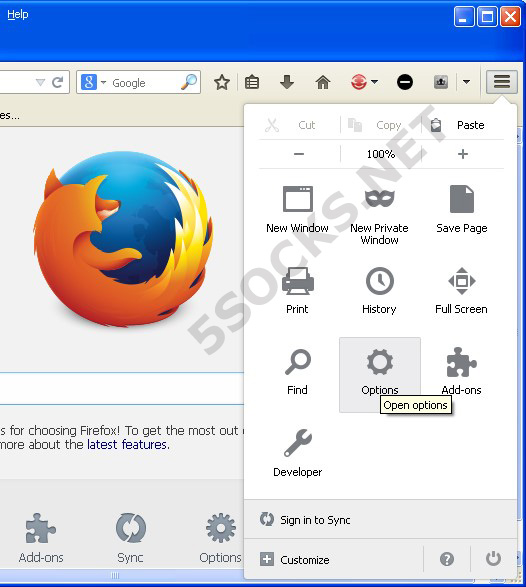
You can read step by step instruction about configuring RDP in the article How to configure proxy with RDP (Remote Desktop Protocol), which you can find on our website.
Now, let’s talk about VPN. Virtual Private Network (VPN) allows users to build logical local network over physical global network, for example over the internet. All transferred data are secured by advanced encryption methods, so users may be assured about data security.
What are the advantages of VPN compared to RDP? VPN can use any port in contrast to RDP, which uses port 3389. If you decide to use RDP from your office computer, you may find that port 3389 is blocked by the administrator and RDP doesn’t work. This is common situation for corporate networks, so you won’t be able to use standard RDP client. Theoretically, you can change RDP port in Windows registry, but it can have a negative impact on PC’s usability. More practical way is to use a VPN connection.
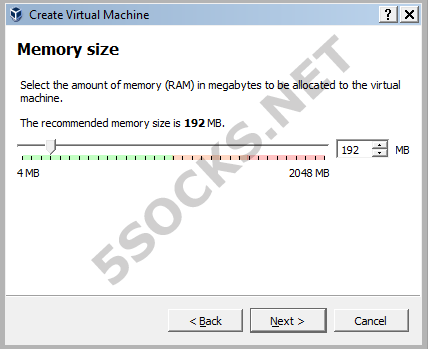
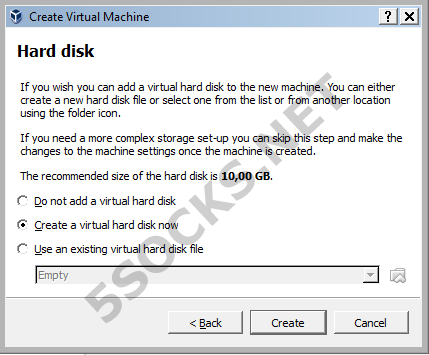
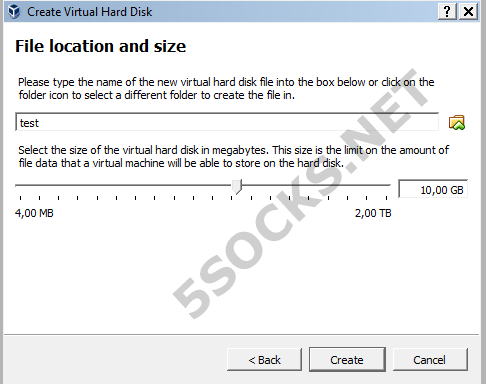
VPN configuration is a rather difficult task, which can be solved only by network professionals. You must configure not only remote server and your device, but also routers and firewalls, used in your network. However, individual users usually needn’t exceptional security, so VPN configuration can be simplified and can be described in some steps, which can be easily performed by average users. Let’s assume that we rent Windows 2008 server and use netbook with Windows 7 OS, connected to the internet via Wi-Fi router D-Link Dir-615.
-
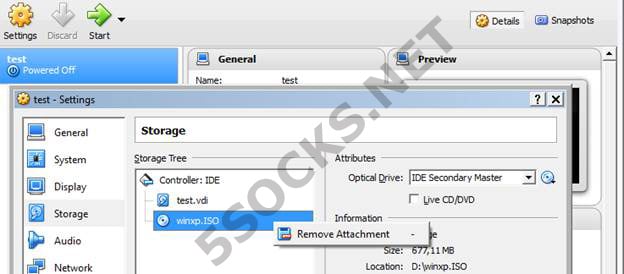
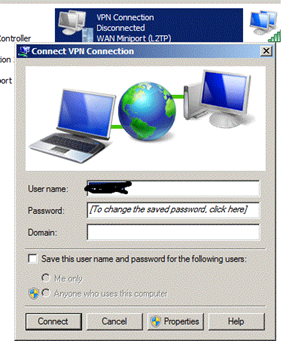
First, you need to connect to remote server using Windows RDP client. Launch RDP client on your device, enter the IP address of a remote server, enter login, click “Connect” and enter password. In some cases, VDS provider can send you special *.rdp file, which automatically starts RDP client with already configured IP address and login. Start this file and enter password given you by VDS provider.
-
Open on the remote desktop «Start ->Administrative tools -> Server manager»
- Open tab «Roles -> Add roles»
- Click “Next” button in the installation wizard, select ““Network Policy and Access Services” and click “Next” button again.
- Open tab “Role services” and select “Routing and Remote Access Services”, “Remote access service”, “Routing” and click “Next” button. Then click “Install” button and wait until the process will be completed
-
Click “Close” button and then click “OK” button to reboot server. Your RDP connection will be broken.
-
The process of rebooting the remote server takes 3-5 minutes, so it’ll be unavailable for RDP connection for that period. Wait 3-5 minutes (depending from the service provider) and try to establish RDP connection again. After successful connection the setup wizard continues to perform the setup process. After finishing it you’ll be displayed an information window with the results.
-
Open tab “Roles -> Routing and remote access”, right click on it and choose “Configure and enable routing and remote access”
- A setup wizard will be launched. Click “Next” button to continue
- Choose “Custom configuration” and click “Next” button
- Choose “VPN access”, click “Next” button, then click “Finish” button
- Start the service
- Right click on “Routing and remote access” and choose “Properties”
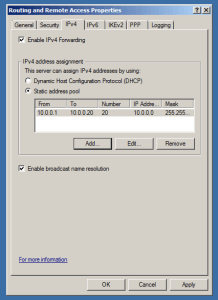
- Open tab “IPv4”, select “IPv4 forwarding”, select “Static address pool” and click “Add” button
- Enter IP address range for connected users and click “OK”
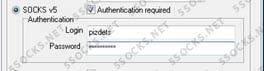
- Next, add user for VPN connection. Right click on “System tools -> Local users and groups -> Users” and choose “New user”. Fill in all the fields according following recommendations:
- User. Enter any login you wish which will be used for VPN connection. This login must differ from any user names and group names already used on this server.
- Full name. Optional entry field.
- Description. Optional entry field.
- Password. Any password you wish up to 127 characters. Password must contain at least 8 characters of the three following groups:
- capital (upper-case) Latin letters from A to Z
- lower-case Latin letters from a to z
- decimal digit characters from 0 to 9
- non-alphabetical characters, for example !, $, #, %.
So, you need to use at least one upper-case letter, one lower-case letter, one decimal digit character and one non-alphabetical character, and the length of the password must be at least 8 characters.
Examples of non-valid passwords: qwert0 (doesn’t contain any upper-case character), Qwertyz (doesn’t contain any decimal digit character) Qwer0 (too short).
An example of valid character: Qwertyz0
- Confirm password. Confirm previously entered password.
- Unselect “User must change password at next logon”. Select “User cannot change password”, “Password never expires”.
- Click “Create button”

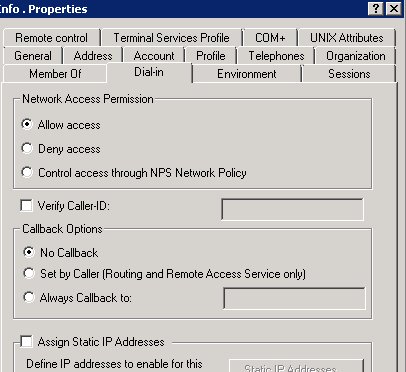
- Next, you must give user access to the VPN. Double click on user name, open tab “Dial-In” and select “Allow access” in “Network access permission”. Click “OK” to continue.
- Open TCP-port 1723 for incoming connections. Open tab “Configuration” -> “Windows firewall with advanced security”. Right click on “Inbound rules” and choose “New rule”.
- Choose “Port” and click “Next” button
- Choose “TCP” and “Specific local ports”. Enter 1723 in the field “Specific local ports”. Click “Next” to continue.
- Choose “Allow the connection” and click “Next”
- Click “Next” in the next window. Enter the name for the profile and click “Finish”.

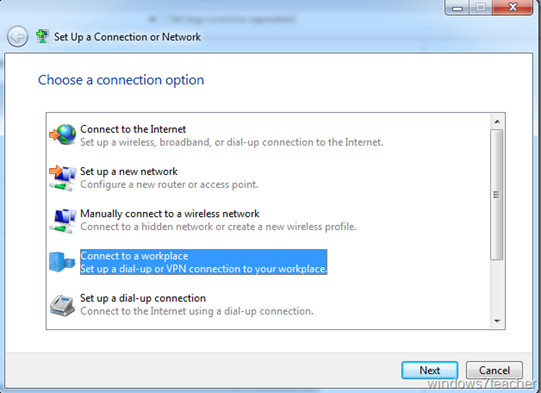
- Now you can connect to remote server from your home computer using VPN. Open “Start -> Control panel -> Network and Internet-> Network and sharing center». Click “Setup a new connection or network”
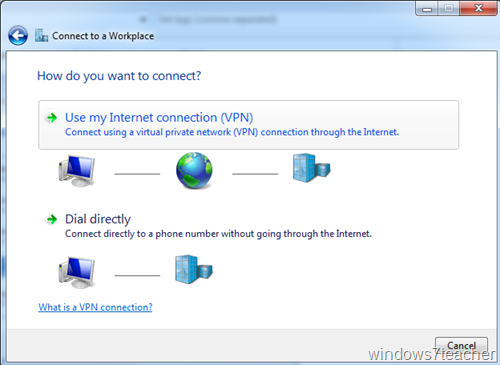
- Choose “Connect to a workplace” then click “Next”
- Choose «Use my Internet connection (VPN)»
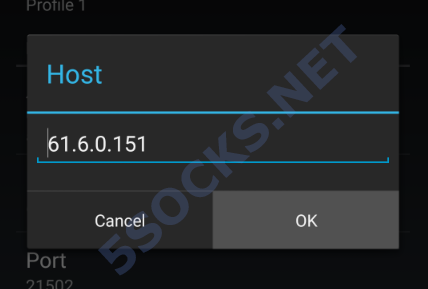
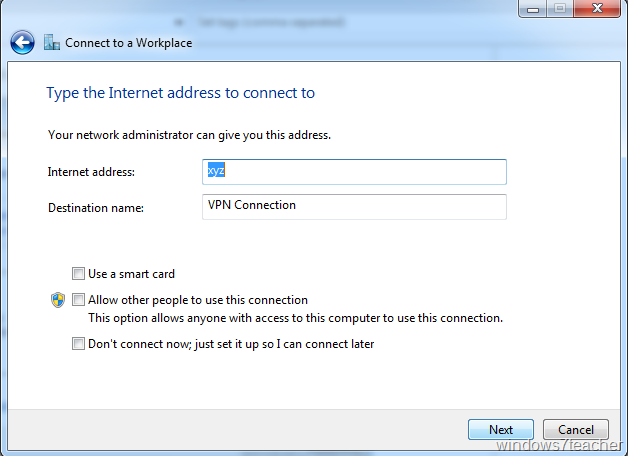
- Type IP address of the remote server in the field “Internet address” and select “Don’t connect now; just set it up so I can connect later”. Click “Next” button
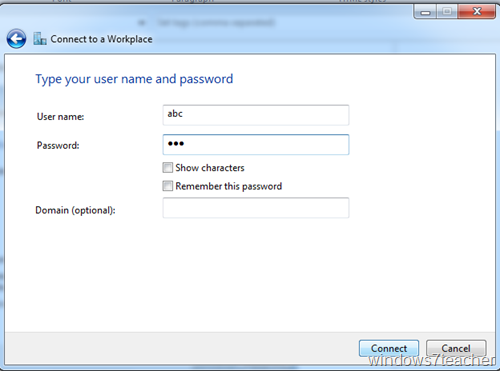
- Enter login and password for VPN connection to the remote serve and click “Connect”
- Click on the network icon in the right down corner of the Windows desktop, right click on the name of the connection and choose “Properties”
- Open tab “Network” and double click on “Internet Protocol Version 4 (TCP/IPv4)
- Click “Advanced” button
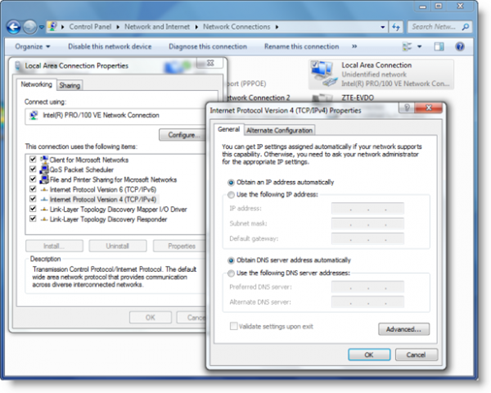
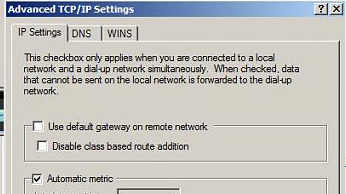
- Unselect “Use default gateway on remote network” and click “OK”. Close all the windows clicking “OK”.
- Click on the network icon in the right down corner of the Windows desktop, right click on the name of the connection and choose “Connect”
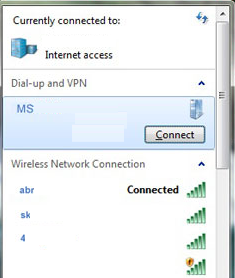
- Enter your VPN login and password and click “Connect”. You’ll be connected to the remote server.
You must clearly understand, that VPN connection is like local network connection, but created over internet. Thus, after establishing VPN connection, your computer and the remote server will be integrated into your local network, but you need an additional instrument to use the desktop of the remote server. So after VPN connection you must establish RDP connection to the remote server using IP address of the server in the local network (in our example 192.168.2.1).
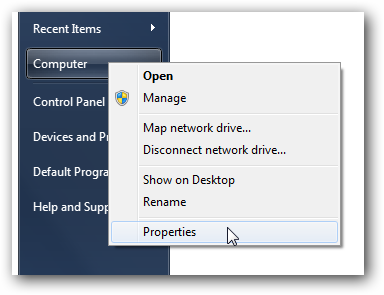
First, you need to allow RDP connection. Open the remote server’s desktop (using RDP connection, not VPN connection), open “Start”, right click on “Computer” and choose “Properties”.
Click “Remote settings” in the left part of the window
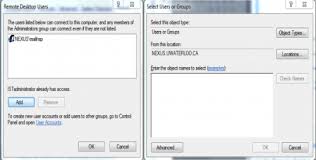
Click “Select users”, then click “Add” button
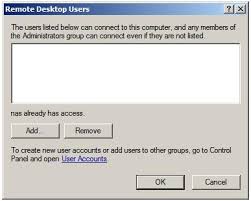
Enter user name for VPN connection and click “OK”. Click all opened windows clicking “OK”.
Now you can connect to VPN server using RDP. Open your RDP client software, enter local IP addess if the server (in our case 192.168.2.1), enter login and password for VPN connection, then click “Connect” button

RDP connection will be established. Later you needn’t to modify any settings – just connect to the remote server using VPN, then establish RDP connection using local network server IP address (in our example 192.168.2.1).
Next you must configure SOCKS proxy using step by step instruction How to configure proxy using RDP (Remote Desktop Protocol), which could be found on our website.
You must understand that there are a lot of additional setting for VPN connection providing additional security, but it can be correctly used only by computer network professional. However, it’s enough to make elementary VPN connection settings, described in this article, for satisfying personal needs.
Also there are a lot of additional software tools and ready to use VPN services, which can be used for spoofing your IP address. Such services are easy to use, but you use unknown servers and can lose your data.
However, you can use additional software on your own server such as OpenVPN. Usually this tools are free, but you must spend a lot of time to configure it. So, I recommend average users to use standart Windows tools for VPN and RDP connection.
Summary
It’s enough to use RDP for establishing anonymous access to internet for personal needs. This protocol is secured, so your data won’t be stolen by hackers.
If you want to get more secured data channel for business needs, you can use RDP over VPN.
In any case you must use our SOCKS proxy service for spoofing IP address and bypass regional bans, used by your provider. The most convenient software tool for SOCKS is ProxyHelper. You can find all the information about ProxyHelper in FAQ on our website.