 en
en  Russian
About Widecap
Widecap is an extended version of the system proxifier called Freecap,. Widecap is not an update to Freecap, it is just another application that was improved to sport new features and better proxifying performance. Widecap can be used for security purposes as it hides your real IP and makes you safe from hackers. It can also be used for gaming purposes in which it allows you to use a different IP depending on your need and perform well in online games. Widecap can be used for anonymity purposes too as it really hides your real IP hence you are completely anonymous and becomes unidentifiable. It can also be used on internet tunneling and sharing, best if you wanted to share the internet access among your office workers.
Widecap has been designed and improved to be much more compatible and have the best system integration ever, leaving the Freecap a great leap on behind. This makes Widecap compatibility issues fixed among problems occurring with using the old Freecap application.
Widecap’s proxy engine has been fully rewritten so that it can give the best performance on proxy switching and tunneling. With this, it makes proxy handling smoother and faster, thus boosting its performance for proxifying purposes especially with SOCKS.
Widecap is available for free at http://widecap.ru/en/
Getting SOCKS Proxies
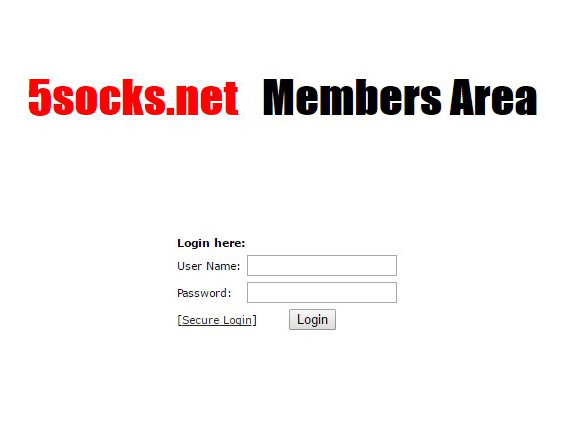
Before you can use Widecap for tunneling applications’ connections into SOCKS, you first need to have a SOCKS proxy, in which you can get it at https://admin.5socks.net/
- Go to https://admin.5socks.net/ and log-in with your account.
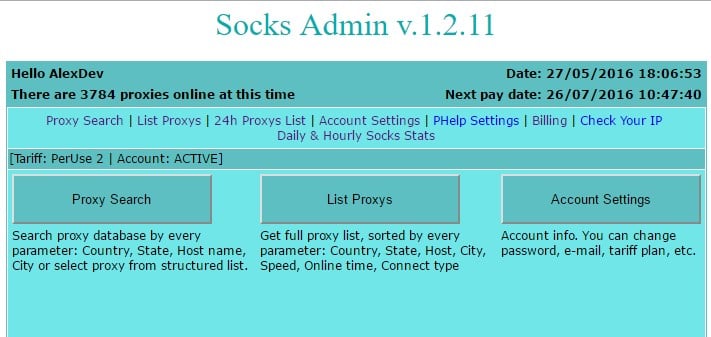
- After logging-in, you will now be redirected on your SOCKS proxy admin panel. From here, you can access your account settings, make searches for proxies and see lists of proxies depending on how you have sorted it.
- Click on List Proxys, then you will be sent on a page containing a list of SOCKS proxies currently available sorted and together with its Country, state, hostname, city, speed, uptime and connection type.
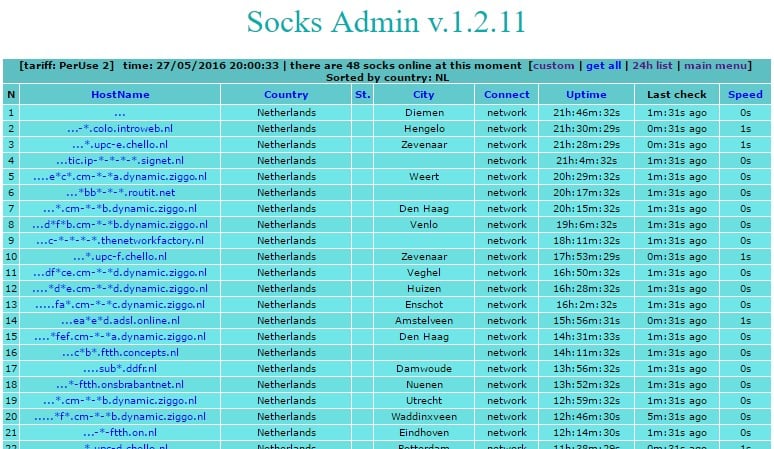
- Let’s try out the first result. Clicking on the hostname of the proxy result will bring you a pop-up window containing information related to that certain SOCKS proxy.
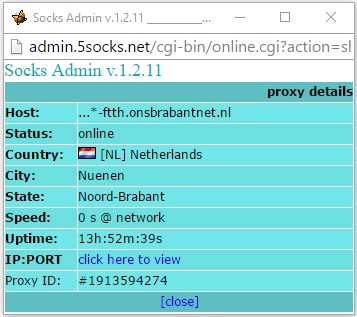
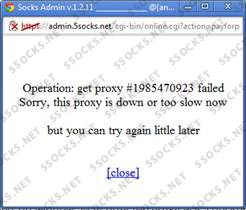
- In order to see the proxy server address and port of the desired SOCKS proxy you are looking for, just click on the click here to view link on the proxy info pop-up window. Wait until the proxy was checked. Sometimes you will get an error window stating that the proxy is currently down or too slow, when this happens, you can always try the proxy that is next in line.
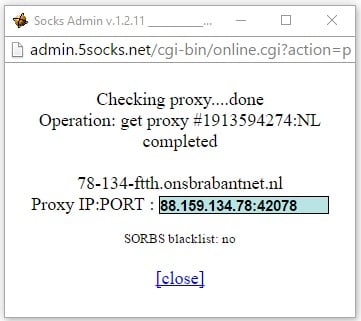
- You can choose the one with 0s in response time, as it really shows that the proxy’s speed is okay, unlike those with 1s or 2s. After successful checking, you will see the information you need with the proxy.
- You can now copy and use the proxy server address and port on the Widecap application.
Using SOCKS proxy via Widecap and testing
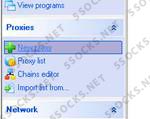
- Open Widecap application, and click on the New proxy link on its left side.
- Clicking the New proxy link will bring you up a new window that will allow you to input your proxy information.
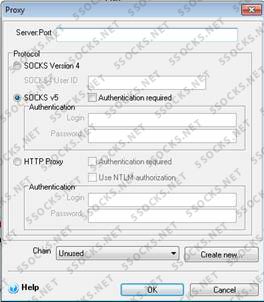
- From this, you can now fill it up with your proxy details. On the first text field, the server:port, just place the Proxy server address and port in the conventional format. In a single line, separated only with a colon, the proxy server address comes first then followed by the port.

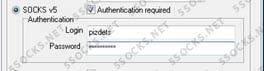
- You can choose the proxy protocol you are going to use. In our case, since we are using a SOCKS v5 proxy, the second radio button was checked, and also the authentication check box. Username and password is needed to be supplied too for proper authentication purposes.
-
Click on the OK button below, and then your settings will now be saved.
-
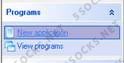
Then we now need to add an application that will be using Widecap’s SOCKS proxy tunneling. To add an application, click on New application on the left hand side of the Widecap window.
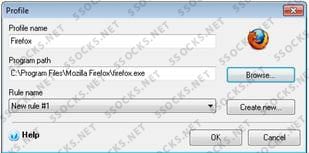
- Clicking on the New application link will bring you a window in which you can define a new profile for a certain app. Just fill in the required info, such as profile name, which can be anything. Then browse for the program path and then select the rule of proxifying in which you can select the default rule or whichever you had created.
- When you hit the OK button to save the app profile you made, and then go to the view programs tab, you can now see the app present in the widecap window. Having it checked will means that it should undergo tunneling of proxy into SOCKS.

- Now go to your system tray and check if widecap is enabled from there.

-
If its already enabled, you can now open the program you had added, and the proxy connection it will use will be the socks proxy we had provided earlier.
-
You can always check your IP at http://ipleak.com to see if the tunneling really works.